If your Copilot AI assistant in Copilot Studio struggles with capturing user inputs and keeps repeating questions, the solution lies in setting up topic inputs. These custom variables are key to enhancing your assistant’s intelligence and efficiency. By leveraging topic inputs and generative AI capabilities, your Copilot can streamline user interactions, infer context, and avoid redundant questions. In this guide, we’ll show you step-by-step how to configure topic inputs to improve conversational flows and create a smarter, more effective AI assistant.
Understanding Topic Inputs in Copilot Studio
Topic inputs are essentially custom variables that define how your Copilot topic gathers, stores, and uses data from users. Unlike conversation flows that rely on question nodes, topic inputs allow your AI assistant to start topics intelligently based on context.
For example:
- A user says: “I want to order a light roast coffee.”
- Without topic inputs, the assistant might fail to infer that the coffee type is light roast and ask redundant questions.
- With topic inputs, the assistant instantly understands and processes this information.
Step-by-Step Guide: Setting Up Topic Inputs
1. Navigate to Your Topic
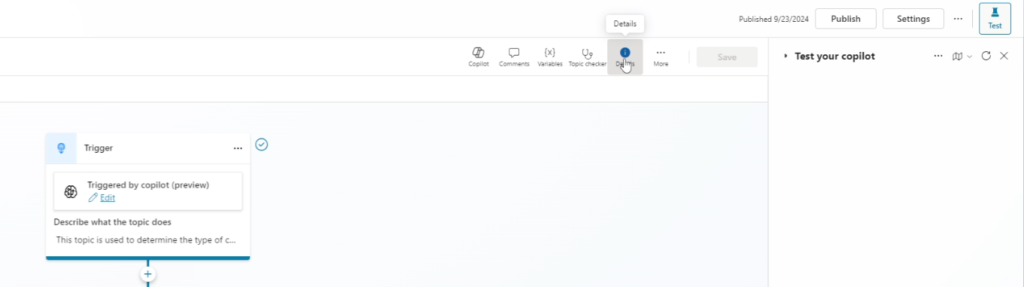
- Go to the Copilot Studio interface and select your target topic (e.g., Order a Coffee).
- Access the Details panel in the top-right corner.
2. Add New Variables
- Under the Inputs section, click Create New Variable.
- Fill in the appropriate settings, including:
- Name: Define the variable (e.g., Coffee Type).
- Type: Specify the data type the variable is (e.g., String, Whole Number)
- Identify As: This defines the entity the variable will use. For more information on setting up Entities, read here.
- Description: The explanation of that the variable is trying to find. Copilot will rely on the description (what you provide here) to gather the variable from the end user’s conversation. Be sure to use good prompting techniques and explain the variable clearly for Copilot to understand
3. Customize Topic Prompts
With topic inputs, you have several additional settings that can be set up, including, no longer needing to use question nodes in the canvas. Instead:
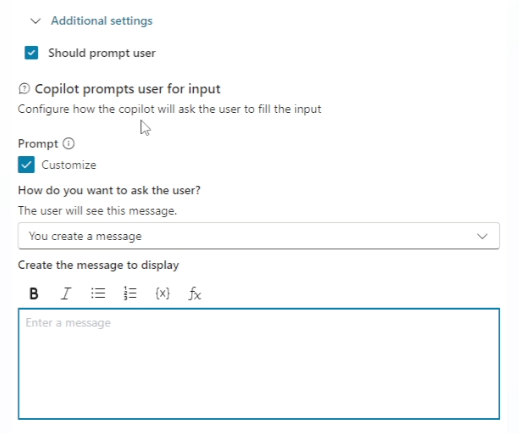
- Select Additional settings
- Check the Customize checkbox under Prompt and then write the message you wish Copilot to display

MASTER COPILOT STUDIO AGENTS
Get the 10 Commandments of Copilot Agents (Free)
Want to learn the Pro Tips of Copilot Agents? Get this free resource sent right to your inbox.
4. Test and Optimize
- After setting up topic inputs:
- Simulate user interactions to ensure the assistant understands and processes variables accurately.
- Example Test:
User: “I’d like a medium roast coffee.”
Copilot: “Got it! Medium roast coffee coming right up.”
Why Use Topic Inputs in Copilot Studio?
- Enhanced AI Efficiency: By leveraging predefined variables, the AI assistant quickly recognizes user intents without asking repetitive questions.
- Streamlined Conversations: Avoid breaking the flow of interaction by intelligently inferring context.
- Customization and Flexibility: Define unique variables and customize inputs to suit your specific business or workflow.
- Improved User Experience: A seamless interaction builds trust and enhances user satisfaction.
Pro Tips for Better Results
- Use Generative AI Power: Topic inputs work synergistically with Copilot’s AI engine to understand complex user prompts.
- Define Options Clearly: Include predefined choices for variables (e.g., coffee types or sizes) to minimize errors.
- Test with Edge Cases: Ensure your assistant handles unusual inputs gracefully, such as misspelled or unexpected responses.
In Conclusion
By integrating topic inputs into your Copilot design, you’ll unlock advanced functionality, improve conversational flows, and enhance the overall performance of your AI assistant.
Thanks for reading till the end! Happy Developing!